Honda Fit Alternator Replacement Cost
When considering the replacement of your Honda Fit’s alternator, there are several cost factors at play.
Knowing these can help you make an informed decision and budget accordingly.

Factors Influencing Cost
- Vehicle Model Year: Newer models might require more expensive parts or complex labor.
- Labor Rates: Your location and the facility you choose impact the labor cost.
- Condition of Related Parts: Additional repairs might be needed if related parts are also damaged.
Price Comparison by Service Providers
- Dealership: Generally the most expensive option, prices can range significantly.
- Independent Mechanics: Often less expensive than dealerships and prices can be more negotiable.
- Automotive Chain Stores: Prices tend to be standardized, sitting between dealerships and independent mechanics.
[amazon bestseller = “Honda Accord Alternator”]
OEM vs Aftermarket Alternator Costs
- OEM (Original Equipment Manufacturer): These parts tend to be more expensive, but are specifically made for your Honda Fit.
- Aftermarket: Usually less costly with a wider range of prices available, though compatibility and quality can vary.
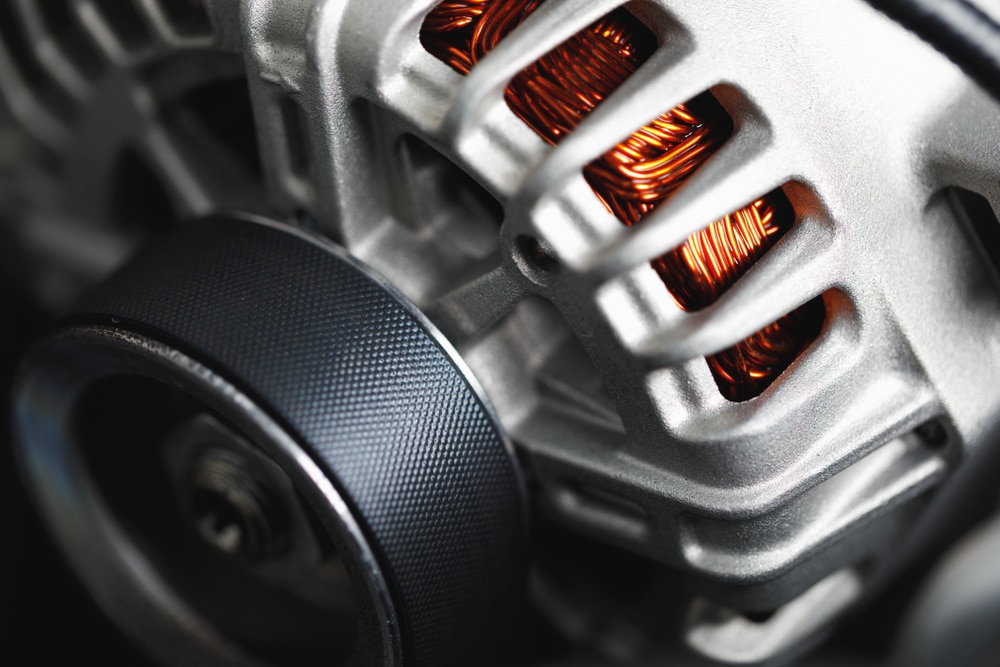
Procedure for Replacing a Honda Fit Alternator
Replacing the alternator in your Honda Fit is a systematic process that involves some preparation and a series of steps.
This ensures the task is completed efficiently and safely.
Tools Required for Alternator Replacement
Before beginning, ensure you have the following tools on hand:
- Socket set: For loosening and tightening bolts.
- Wrench set: For areas where a socket can’t fit.
- Screwdrivers: Both flathead and Philips for any clamps or covers.
- Serpentine belt tool: To remove tension on the belt.
- Torque wrench: For precision tightening of bolts.
- Voltmeter: To test battery and alternator connections.
- Memory saver: Optional, for retaining car settings.
Step-by-Step Replacement Process
- Disconnect the Battery:
- Disconnect the negative battery terminal to ensure safety.
- Access the Alternator:
- Remove components obstructing access to the alternator, such as the splash shield, if necessary.
- Release tension from the serpentine belt and remove it from the alternator pulley.
- Remove the Alternator:
- Unplug the wiring harness and remove any connectors from the alternator.
- Unscrew the mounting bolts using your socket and wrench set.
- Extract the alternator from the engine bay.
- Install the New Alternator:
- Position the new alternator into place and fasten it with the mounting bolts.
- Reconnect the electrical connectors and wiring harness.
- Ensure all connections are secure and tight.
- Reassemble and Test:
- Replace the serpentine belt and ensure proper tension.
- Reinstall any components you removed to access the alternator.
- Connect the negative battery terminal and use a voltmeter to confirm proper alternator function.
Maintenance Tips to Extend Alternator Life
Proper maintenance of your Honda Fit’s alternator is crucial for ensuring its longevity and optimal performance. Here are practical tips to help you prolong the life of this component:
Regularly Inspect the Alternator Belt
- Check the tension of the belt frequently.
- A belt that’s too tight may cause undue strain on the alternator’s bearings, while one that’s too loose may not allow the alternator to charge the battery properly.
- Inspect for wear and tear: Look for signs of cracking or glazing on the belt, as these may indicate the need for replacement.
Maintain Battery Health
- Keep battery terminals clean from corrosion, as this ensures proper charging.
- Test battery often to ensure it holds charge, because a failing battery can overwork the alternator.
Ensure Proper Electrical Connections
- Tighten connections: Loose connections can cause erratic alternator performance.
- Inspect for corrosion: Corroded wires and connections should be cleaned or replaced.
Listen for Unusual Sounds
- Be alert to any unusual noises coming from the alternator region. Grinding or whining sounds can be indicators of internal issues.
Avoid Unnecessary Strain
- Turn off electrical loads such as lights, air conditioning, or the stereo system when they are not needed, especially during engine start-up.